How can I integrate Greenhouse?
Answer
In order to integrate Greenhouse with JOIN, you need a User ID, an API Token, and the subdomain of your Greenhouse career page.
To collect all the information required, please follow the step-by-step instructions below.
Greenhouse integration in 5 steps
Integrating Greenhouse with JOIN only takes five simple steps. We summarized the process for you to keep it as simple as possible and added a slideshow at the bottom of this page to provide visual support for the Workflow in Greenhouse.
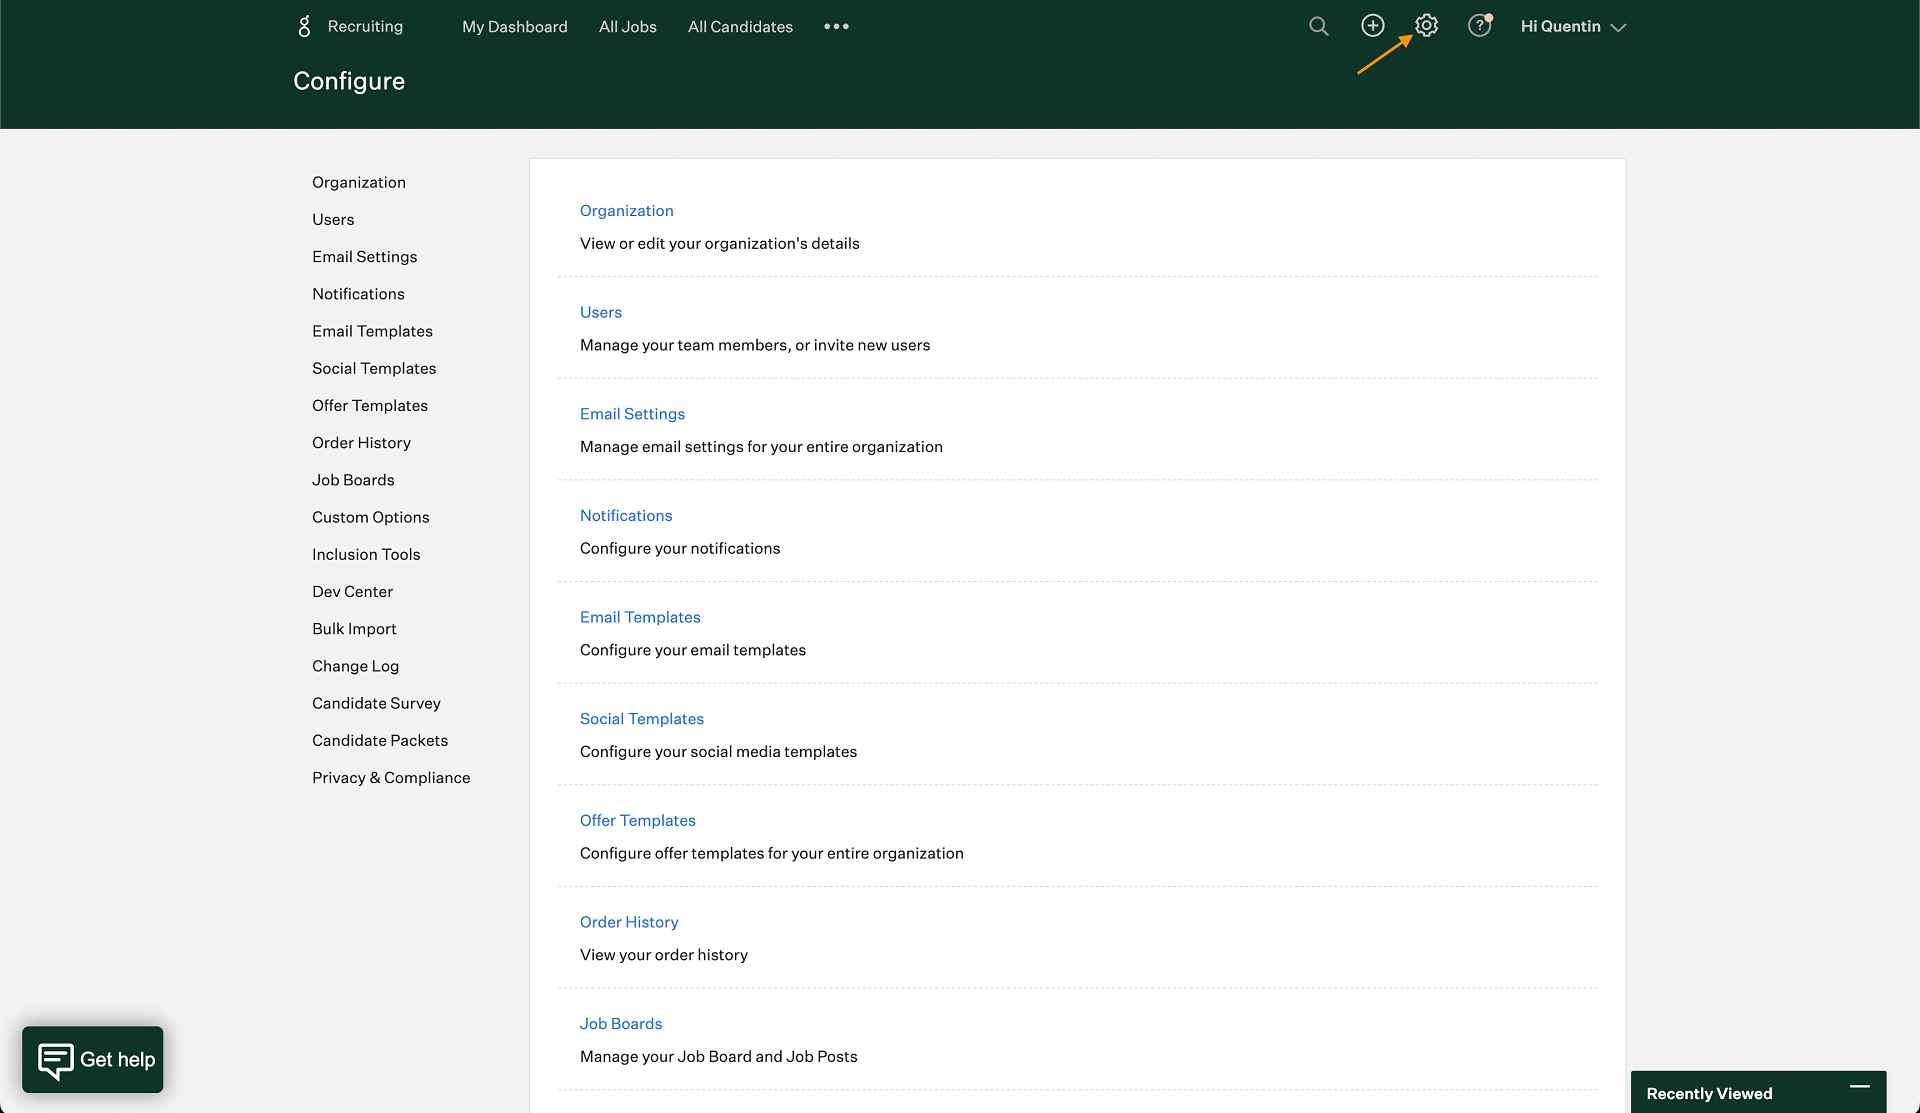
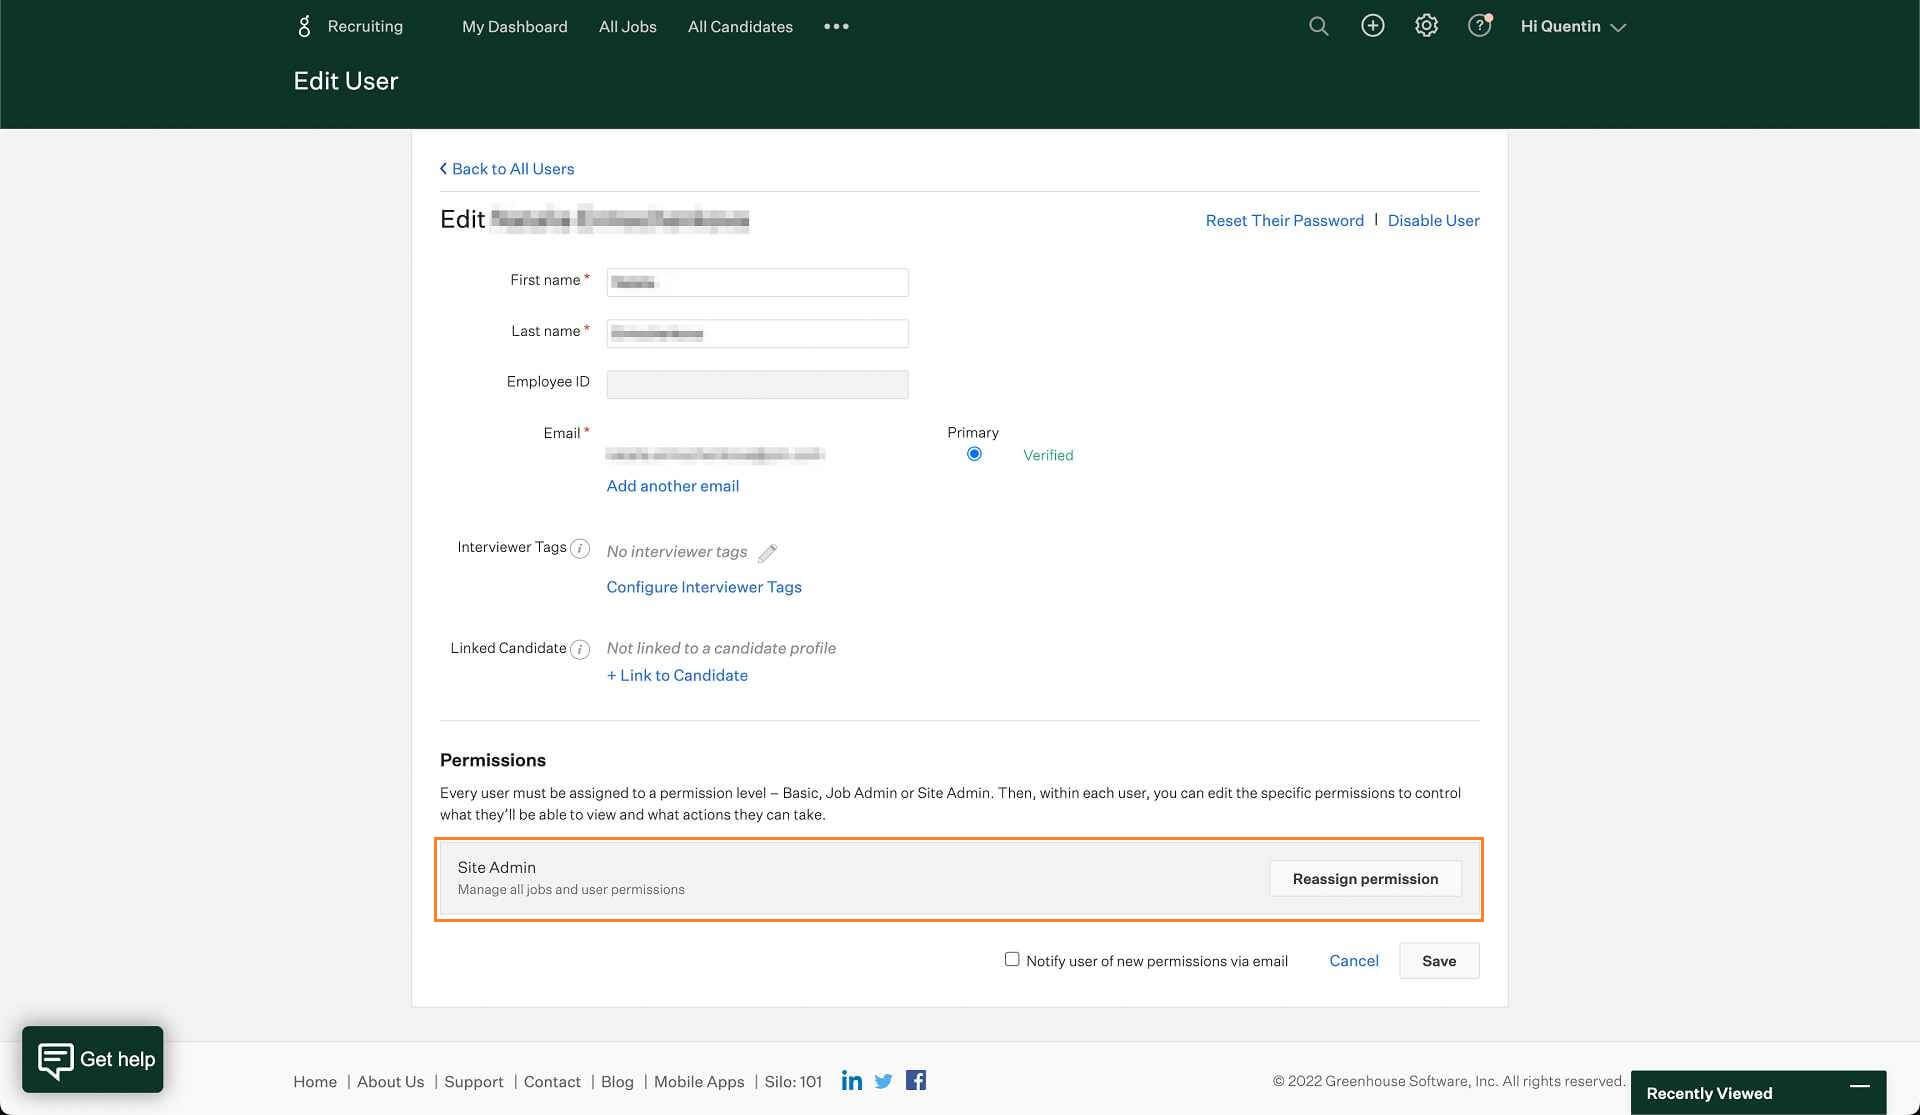
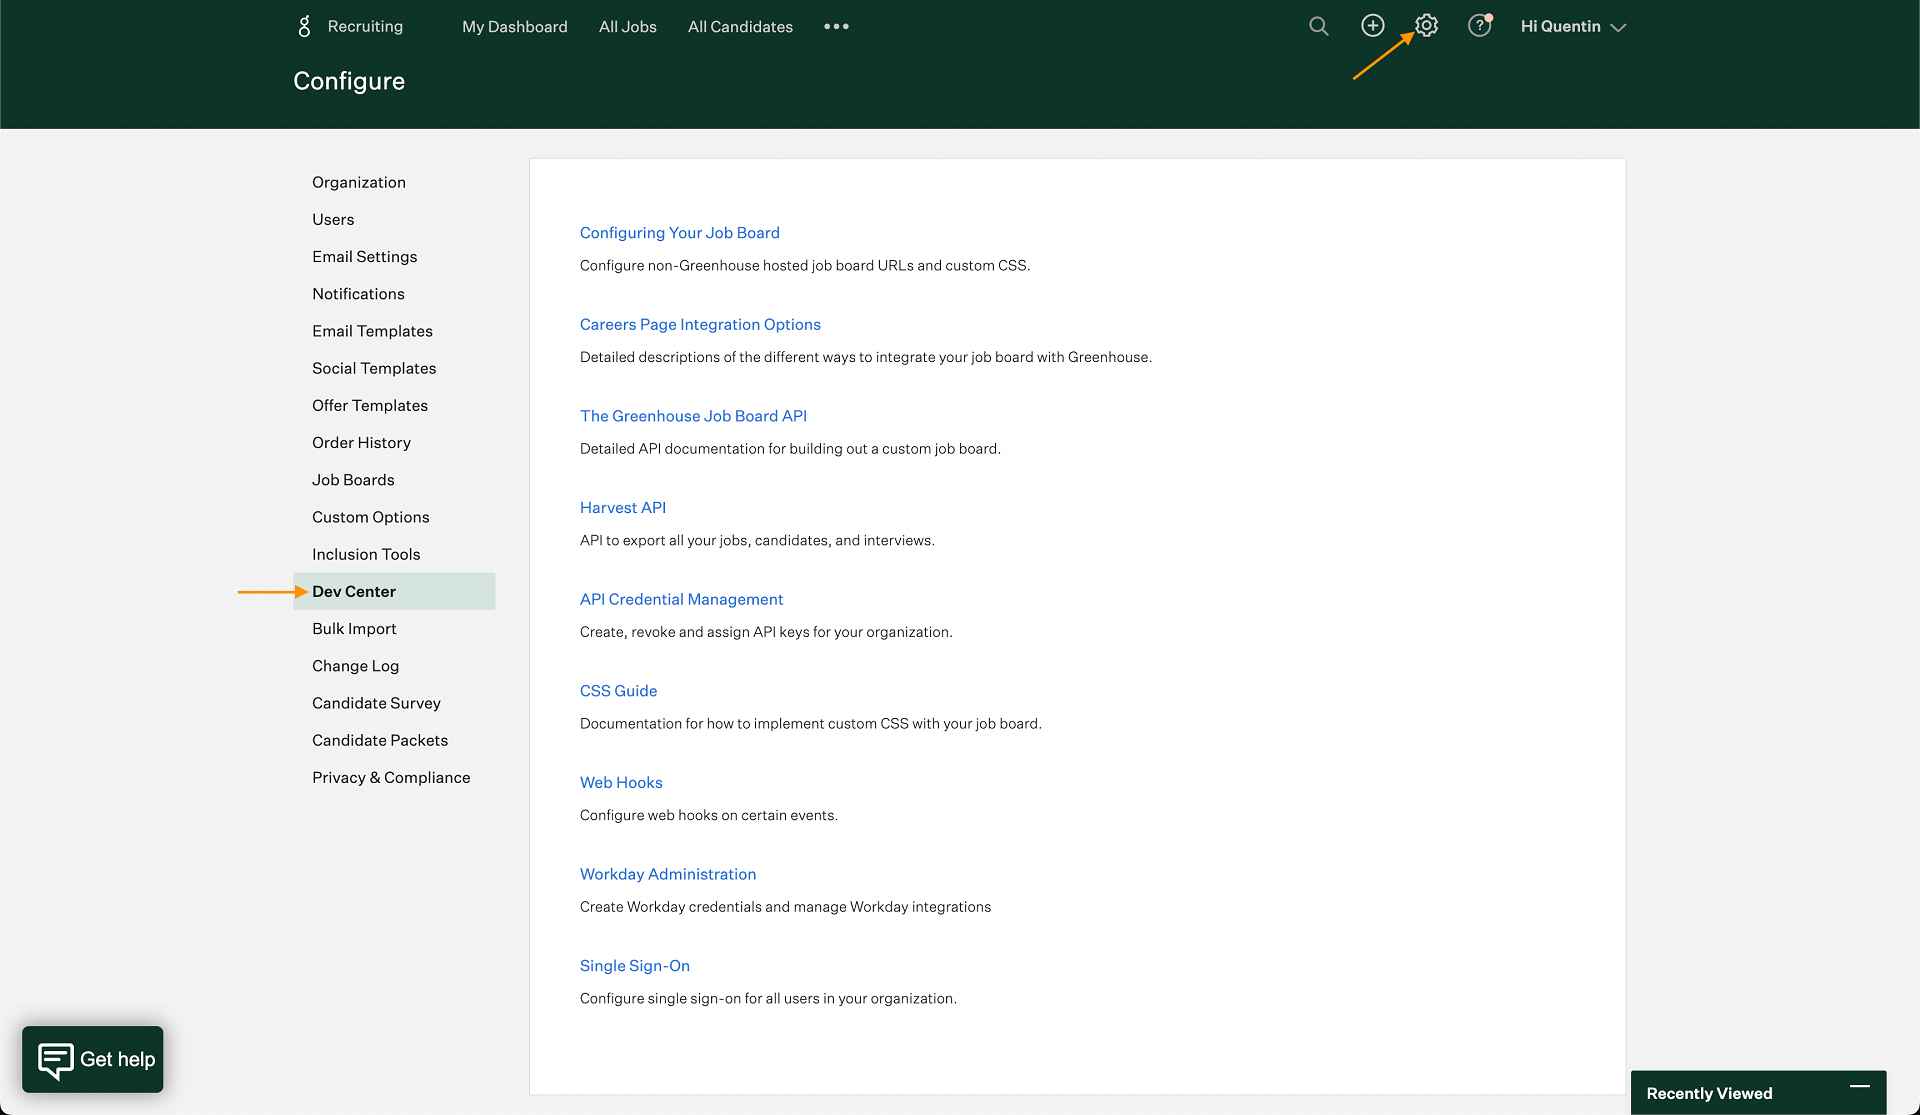
Step 1: Configure user setup permissions in Greenhouse
Before creating the necessary API Token, make sure you have "Site Admin" rights. This is also necessary for retrieving your User ID that will be required in JOIN later on.
You may also need to configure the User permissions in Greenhouse first.
- Navigate to the Configure icon (gear icon in the top right corner), then click Users > Your name.
- At the bottom of the page, in the section "Permissions", check if you already own "Site Admin" rights.
If you do not own the required permissions, please refer to someone in your team who owns Site Admin rights and ask to assign Site Admin Permissions to you as well.
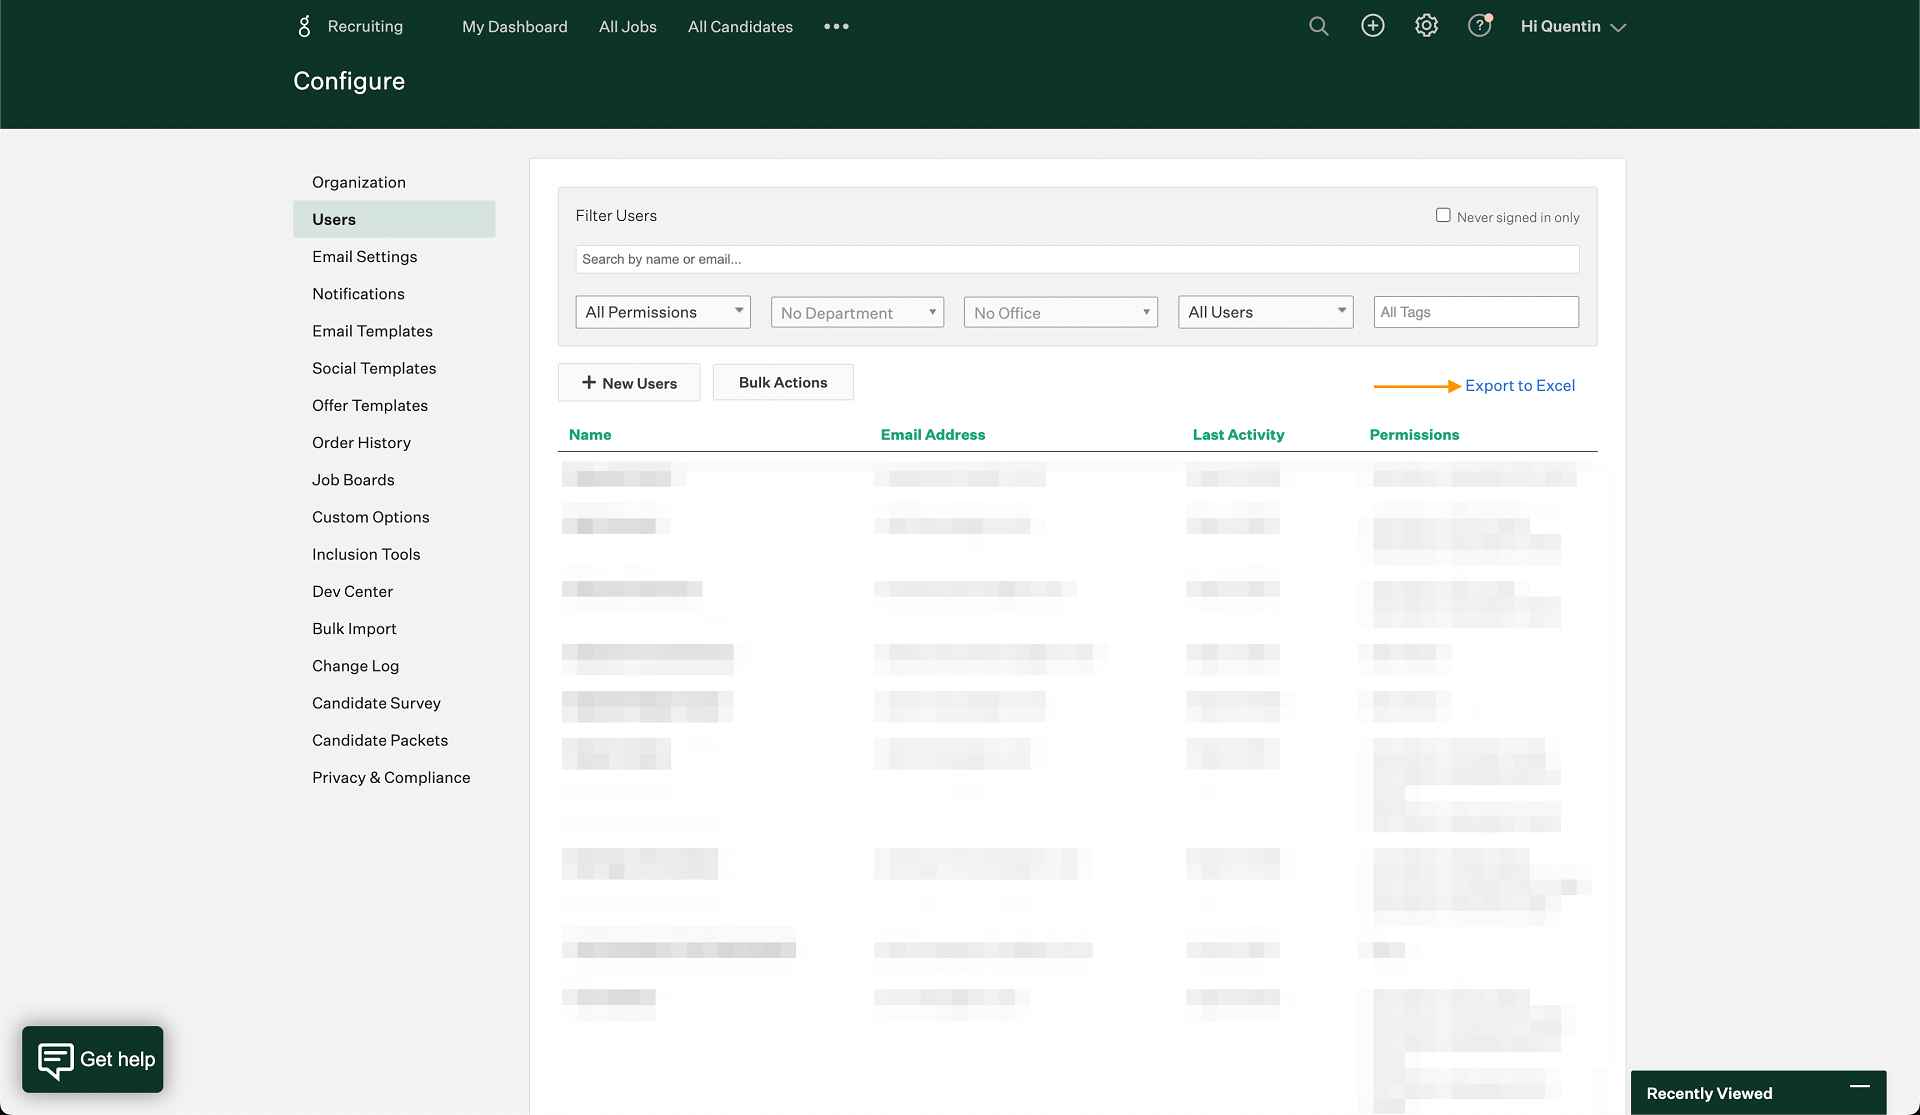
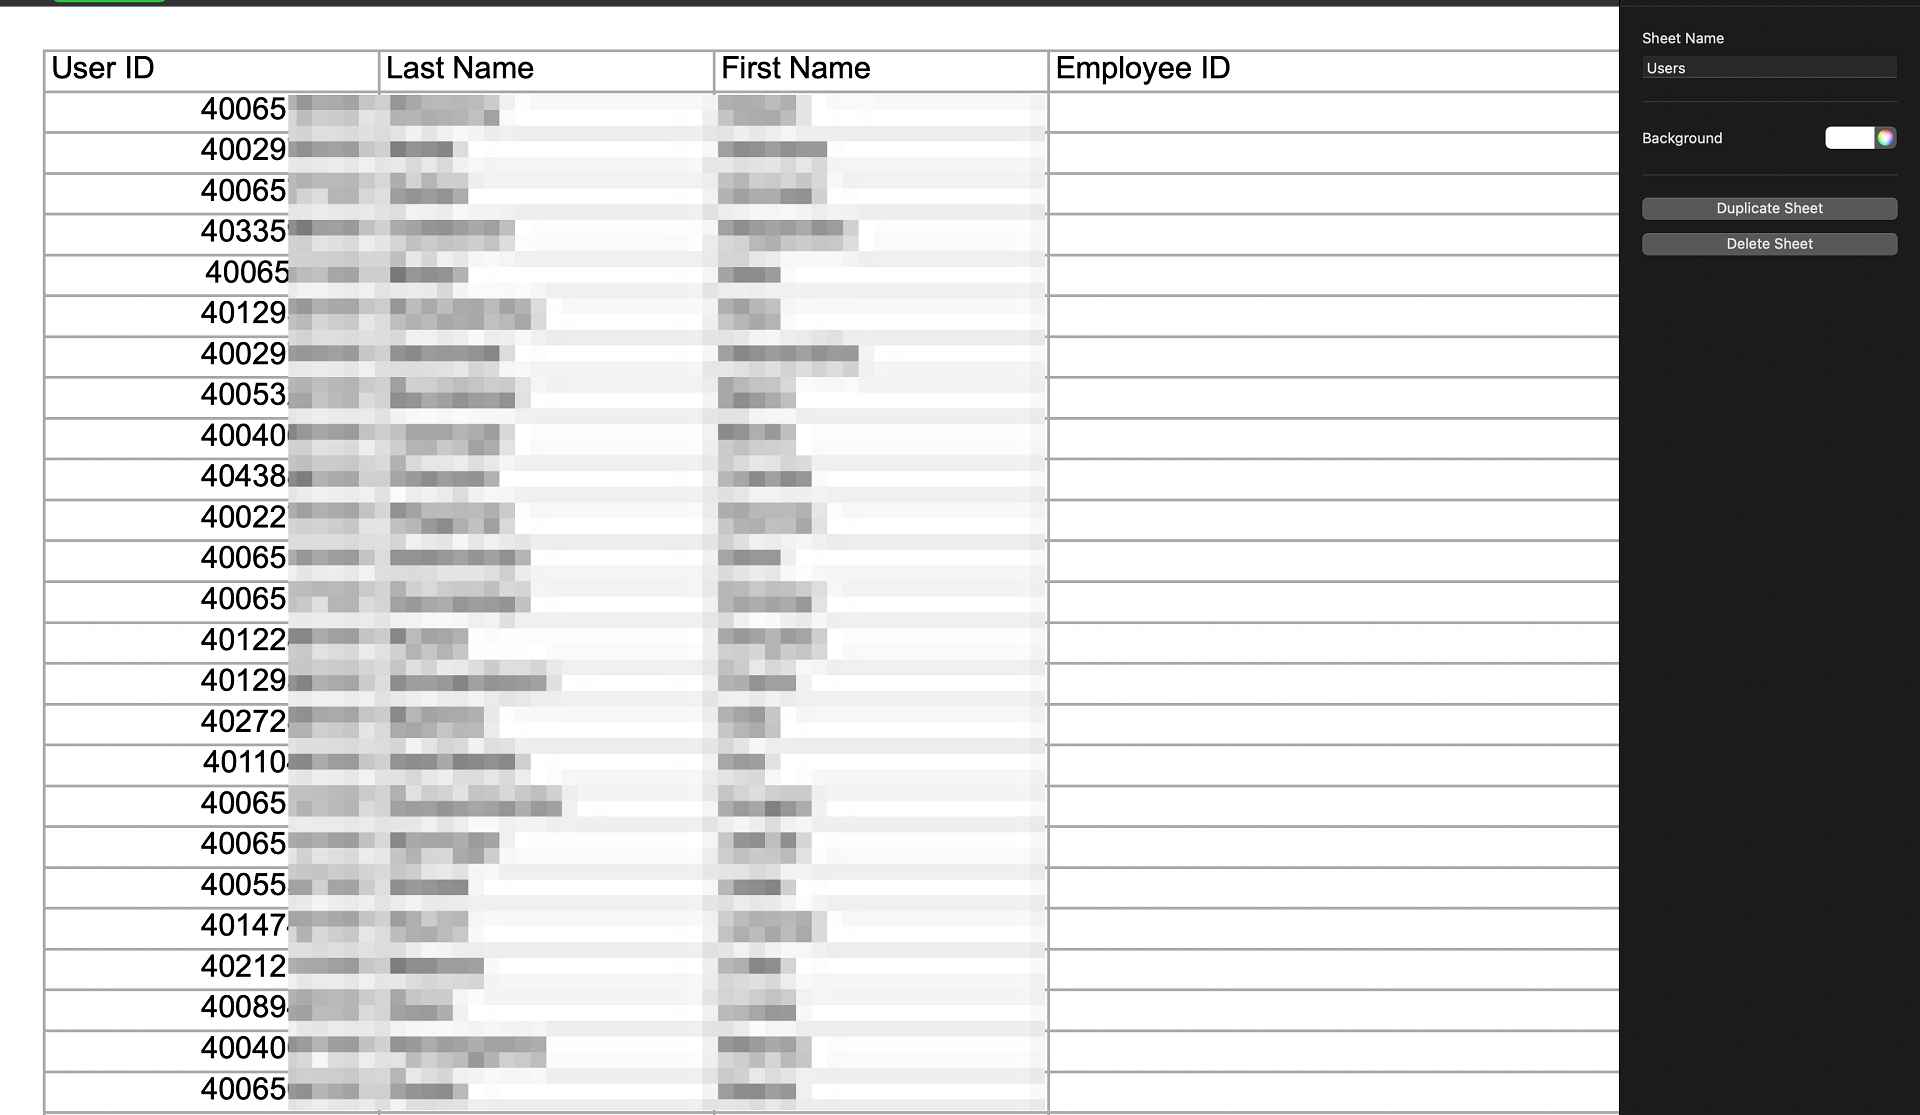
Step 2: Retrieve User ID in Greenhouse
Now that you received the required site admin rights, it's time to retrieve your user ID. This can be done in two simple steps:
- Navigate to Configure > Users and click Export to Excel.
- In the Spreadsheet, find your personal User ID in the left column named "User ID".
The User ID needs to be added under "ATS Identifier" in your Dashboard later on.
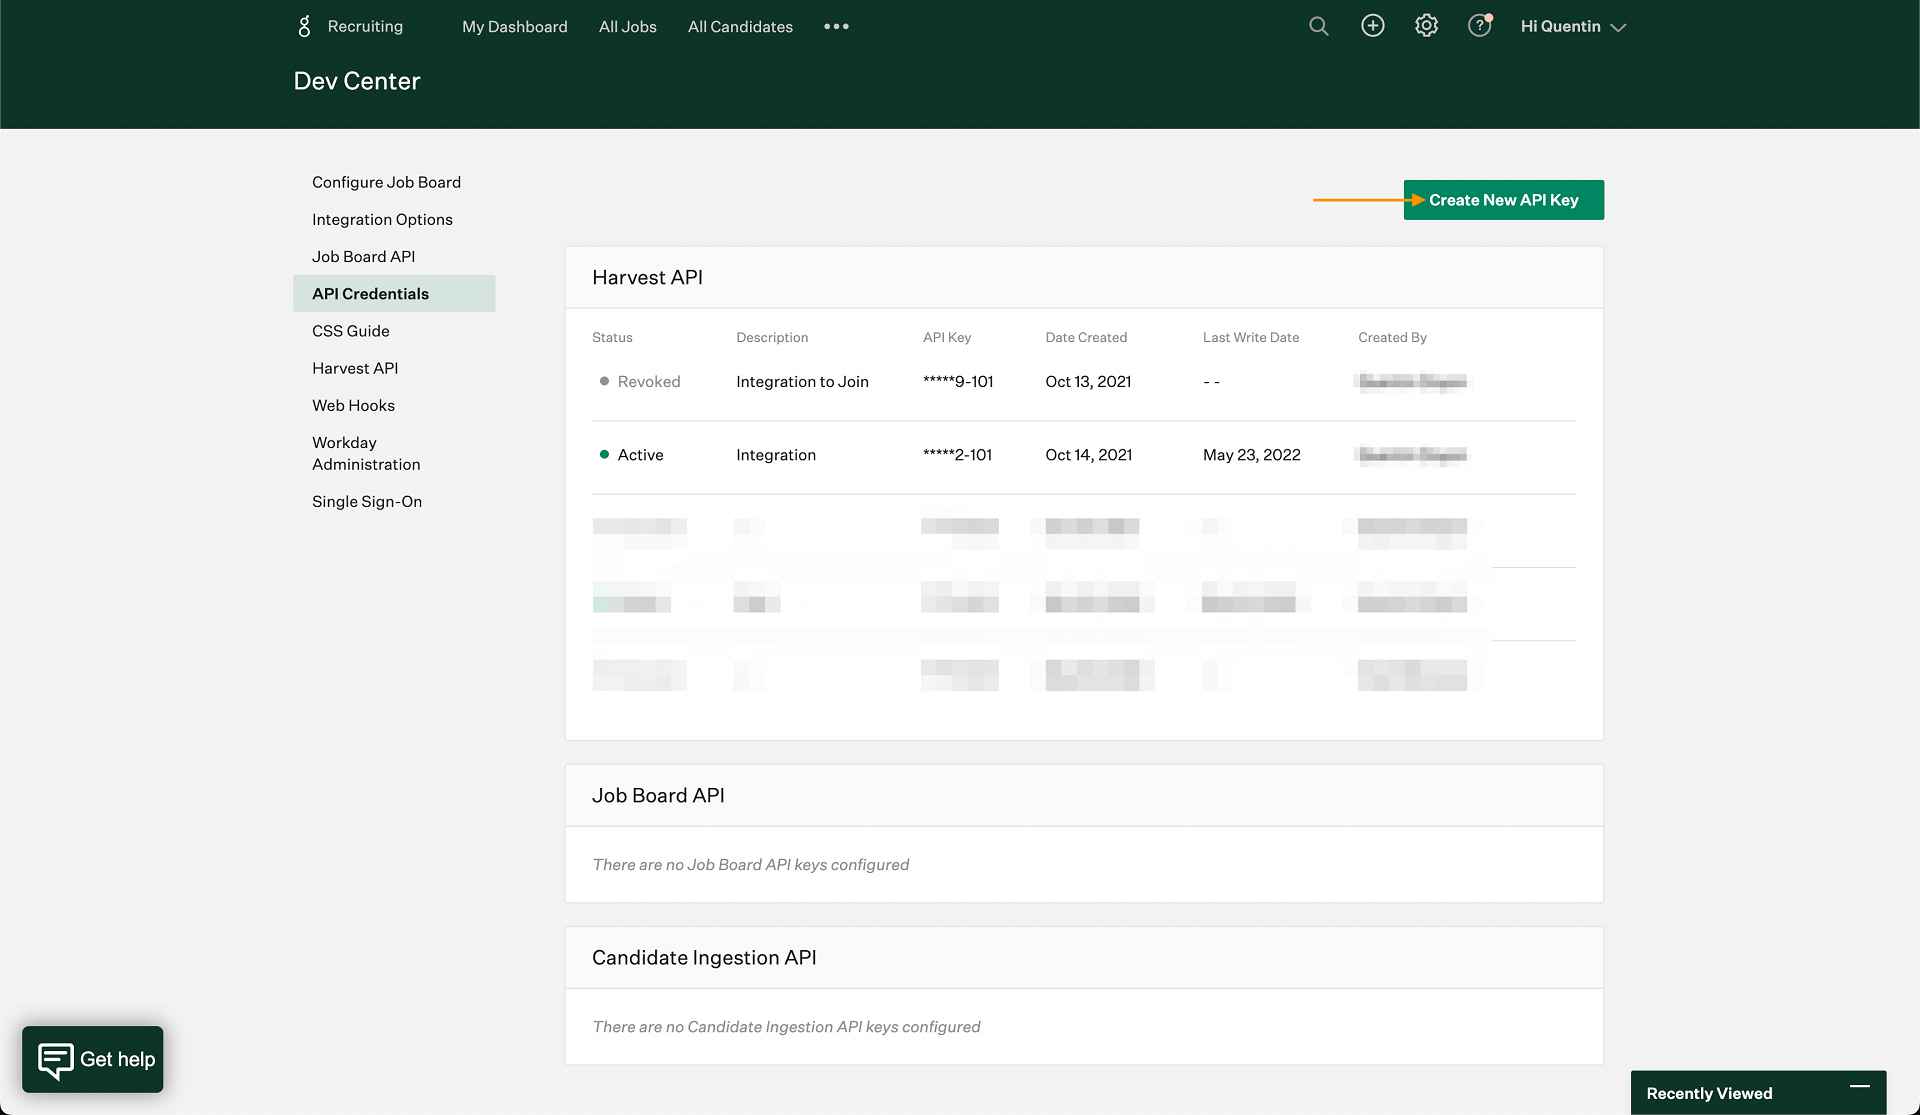
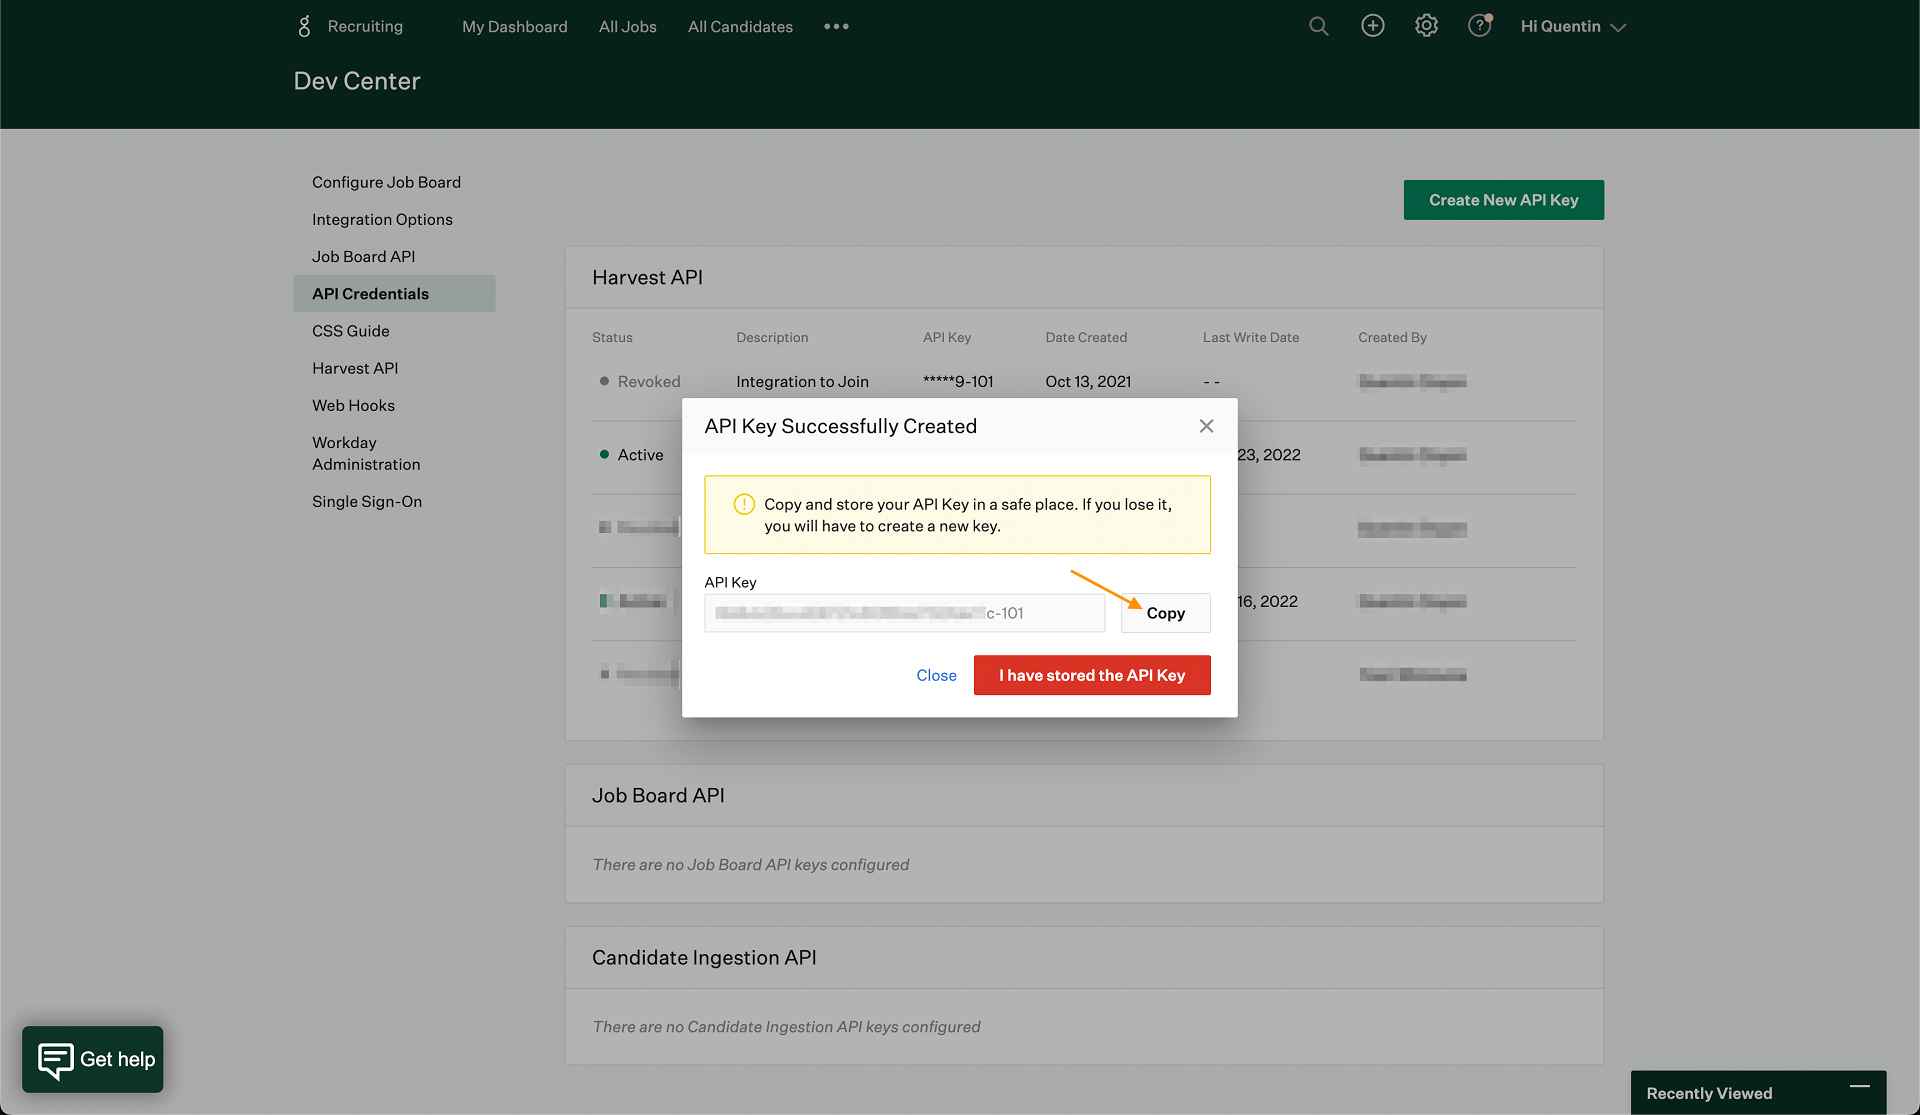
Step 3: Create a Harvest API Key in Greenhouse
Next, you need to create an API-Key in Greenhouse. This is done with the following steps:
- Navigate to Configure > Dev Center > API Credentials.
- Click "Create New API Key" to generate the required Harvest API key.
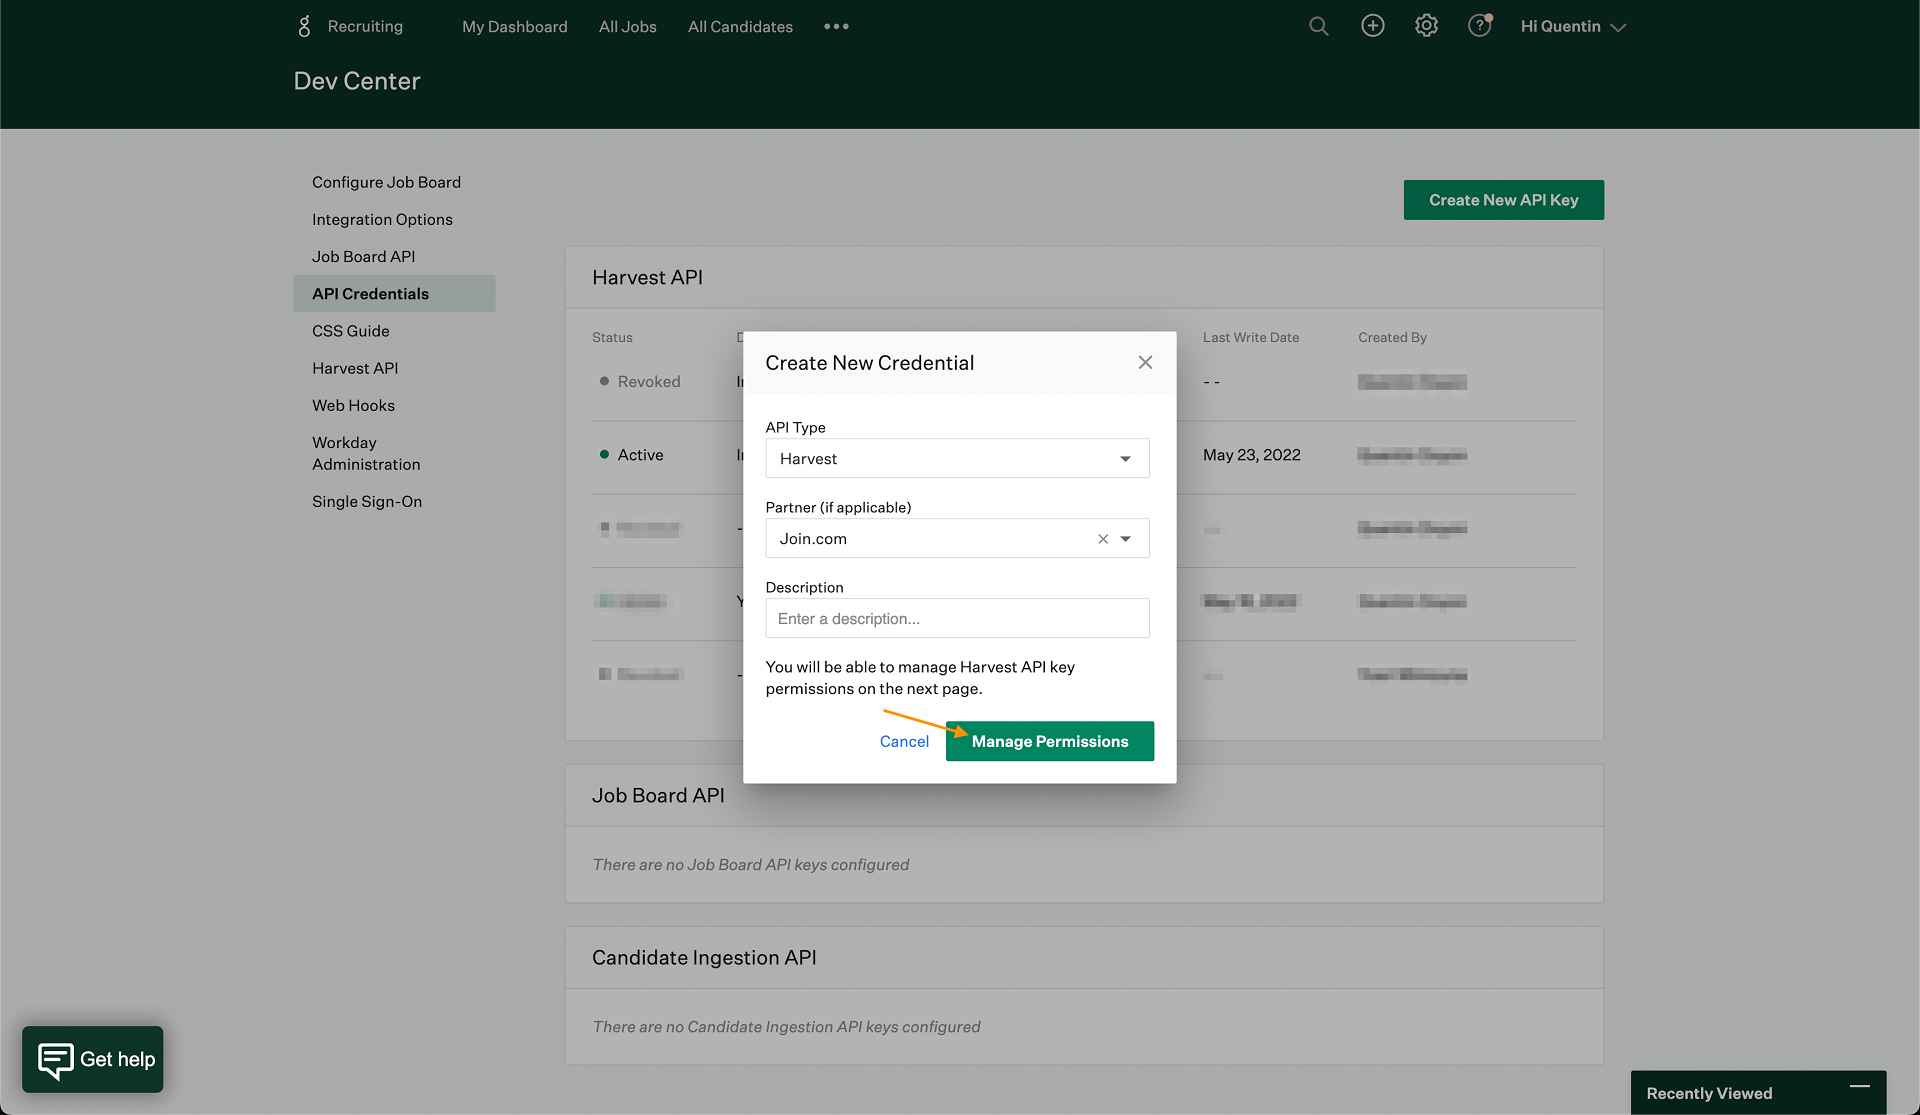
- Select "Harvest" from the Type dropdown menu.
- Select JOIN from the Partner dropdown menu.
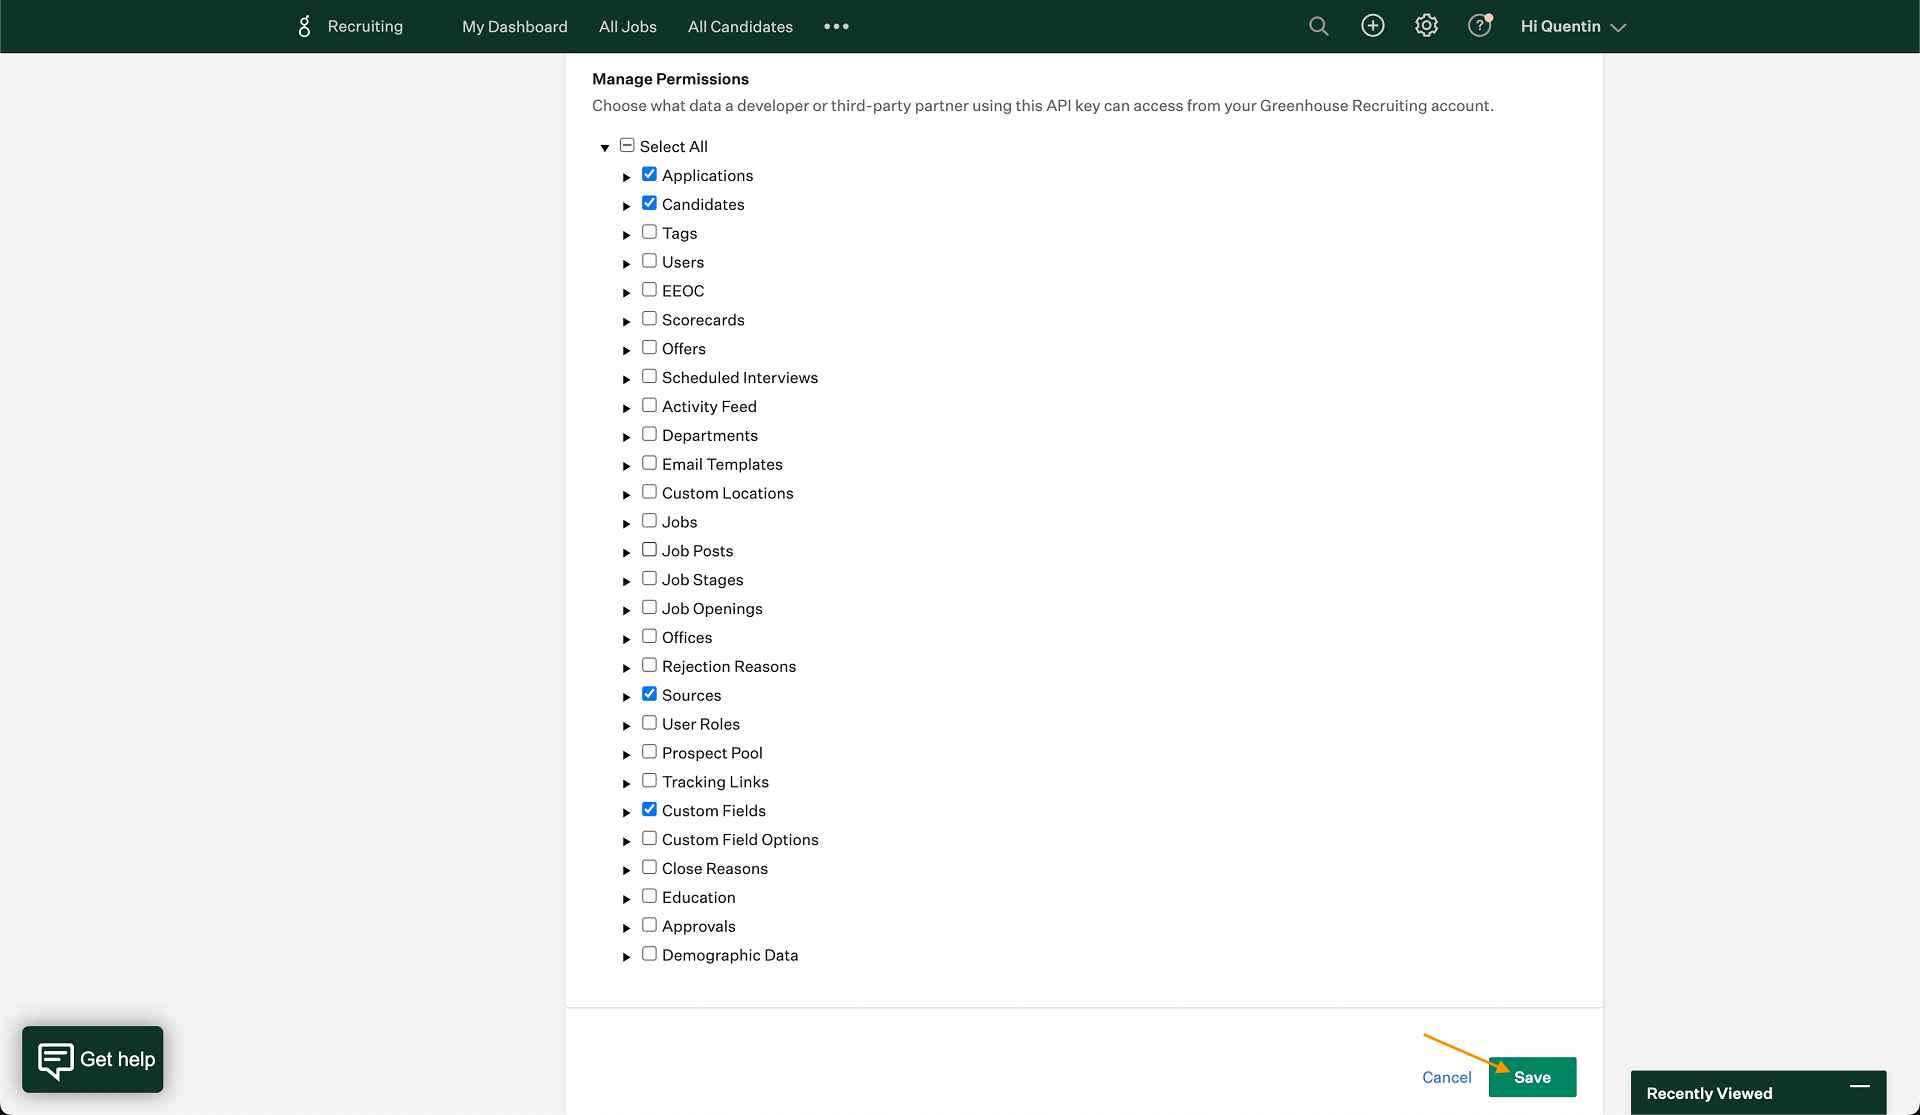
- Click "Manage Permissions".
- Check the boxes for Applications, Candidates, Custom Fields, and Sources.
- Click "Save" and, in the dialogue pop up, click "Copy".
- Paste the API Key into a document and store it in a secure location.
- Click the "I have stored the API Key" button.
Your Harvest API Key for the Greenhouse integration in JOIN is ready to go!
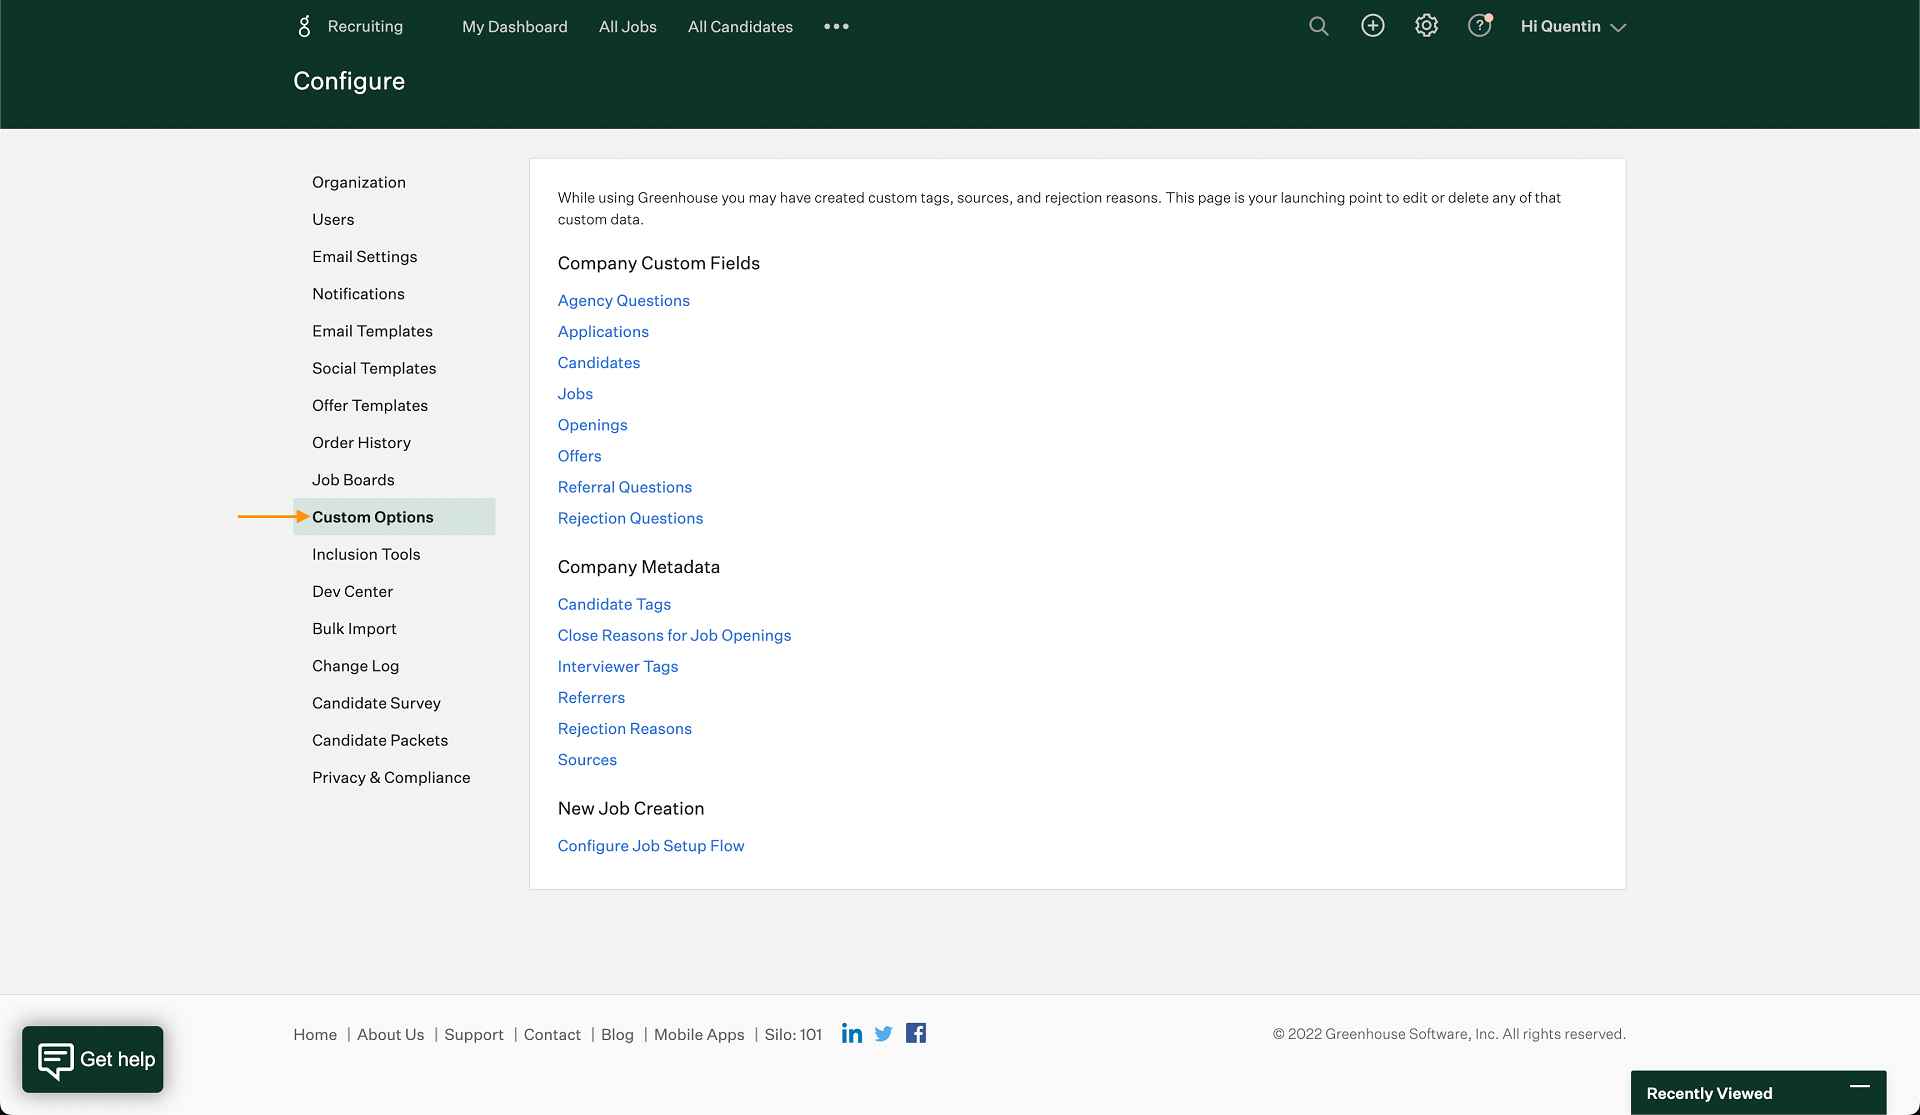
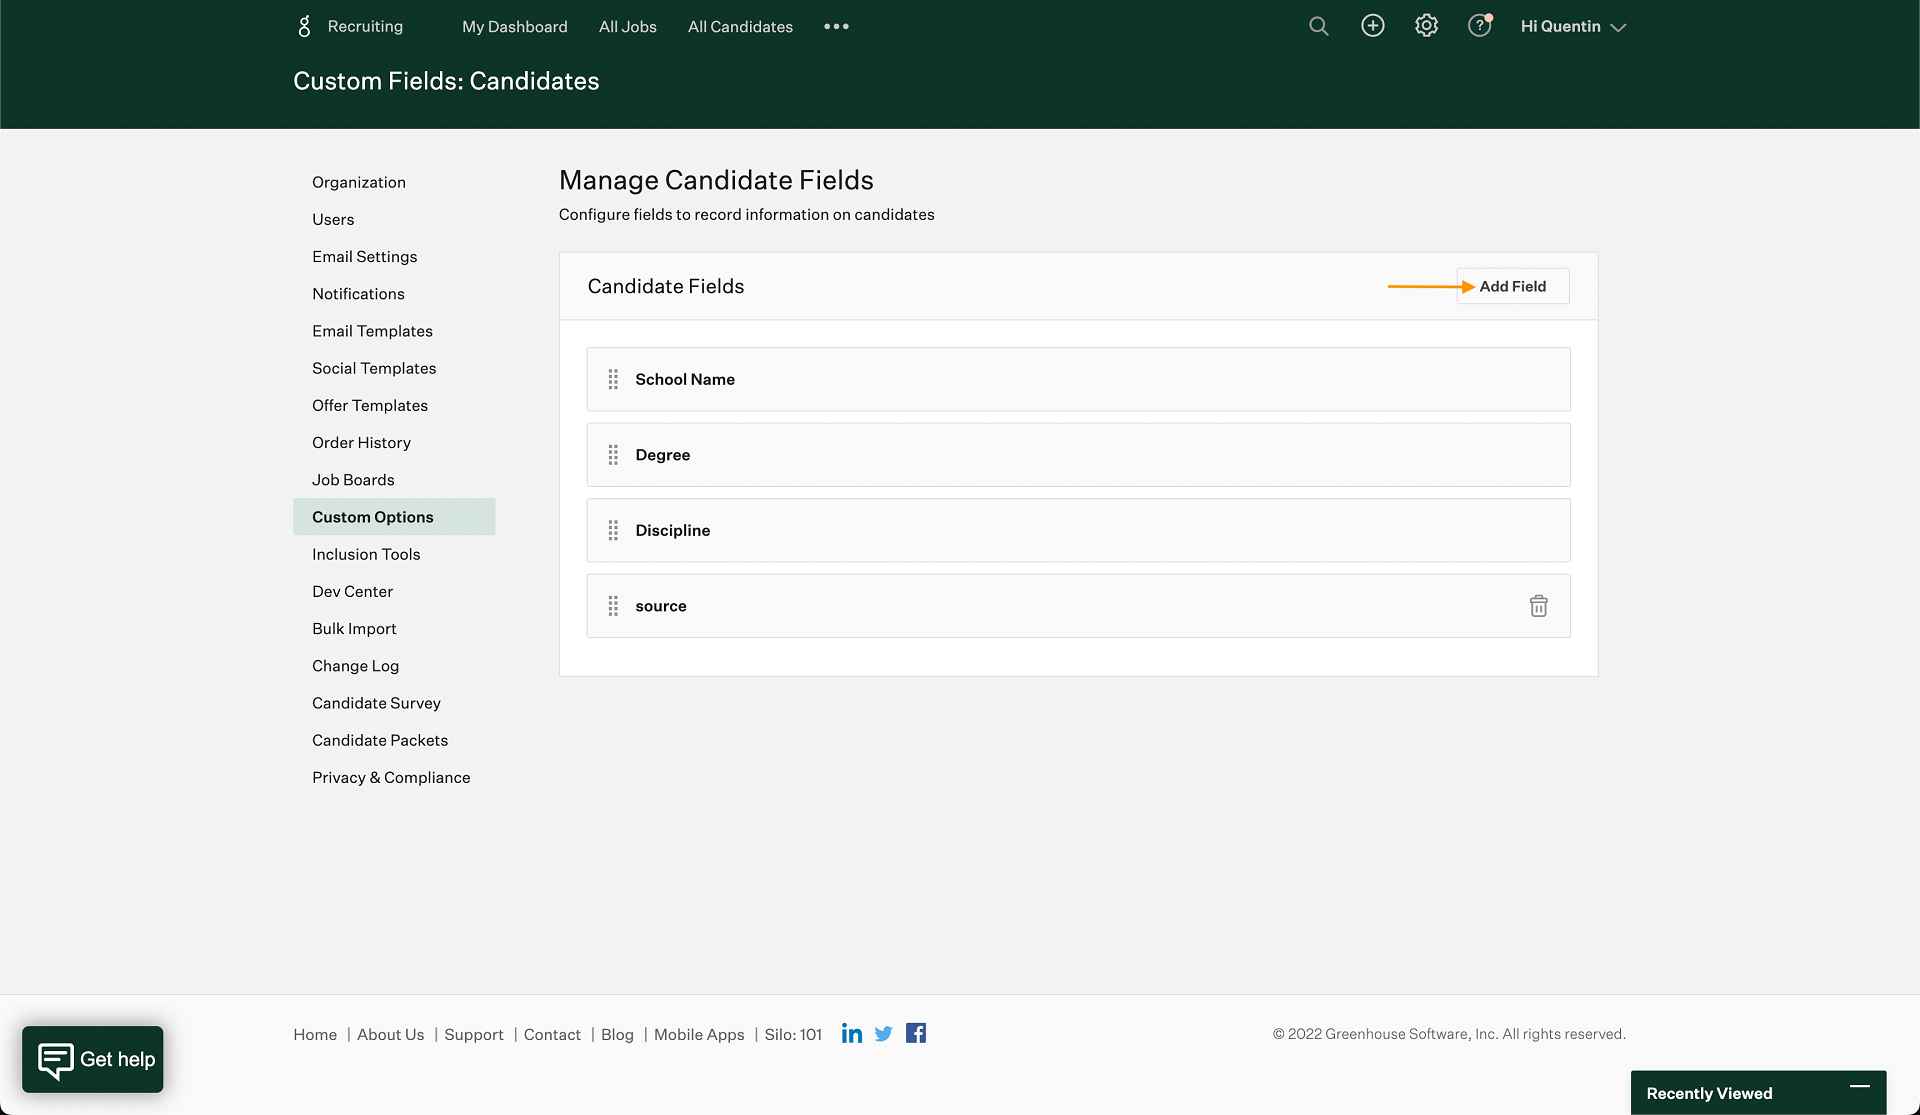
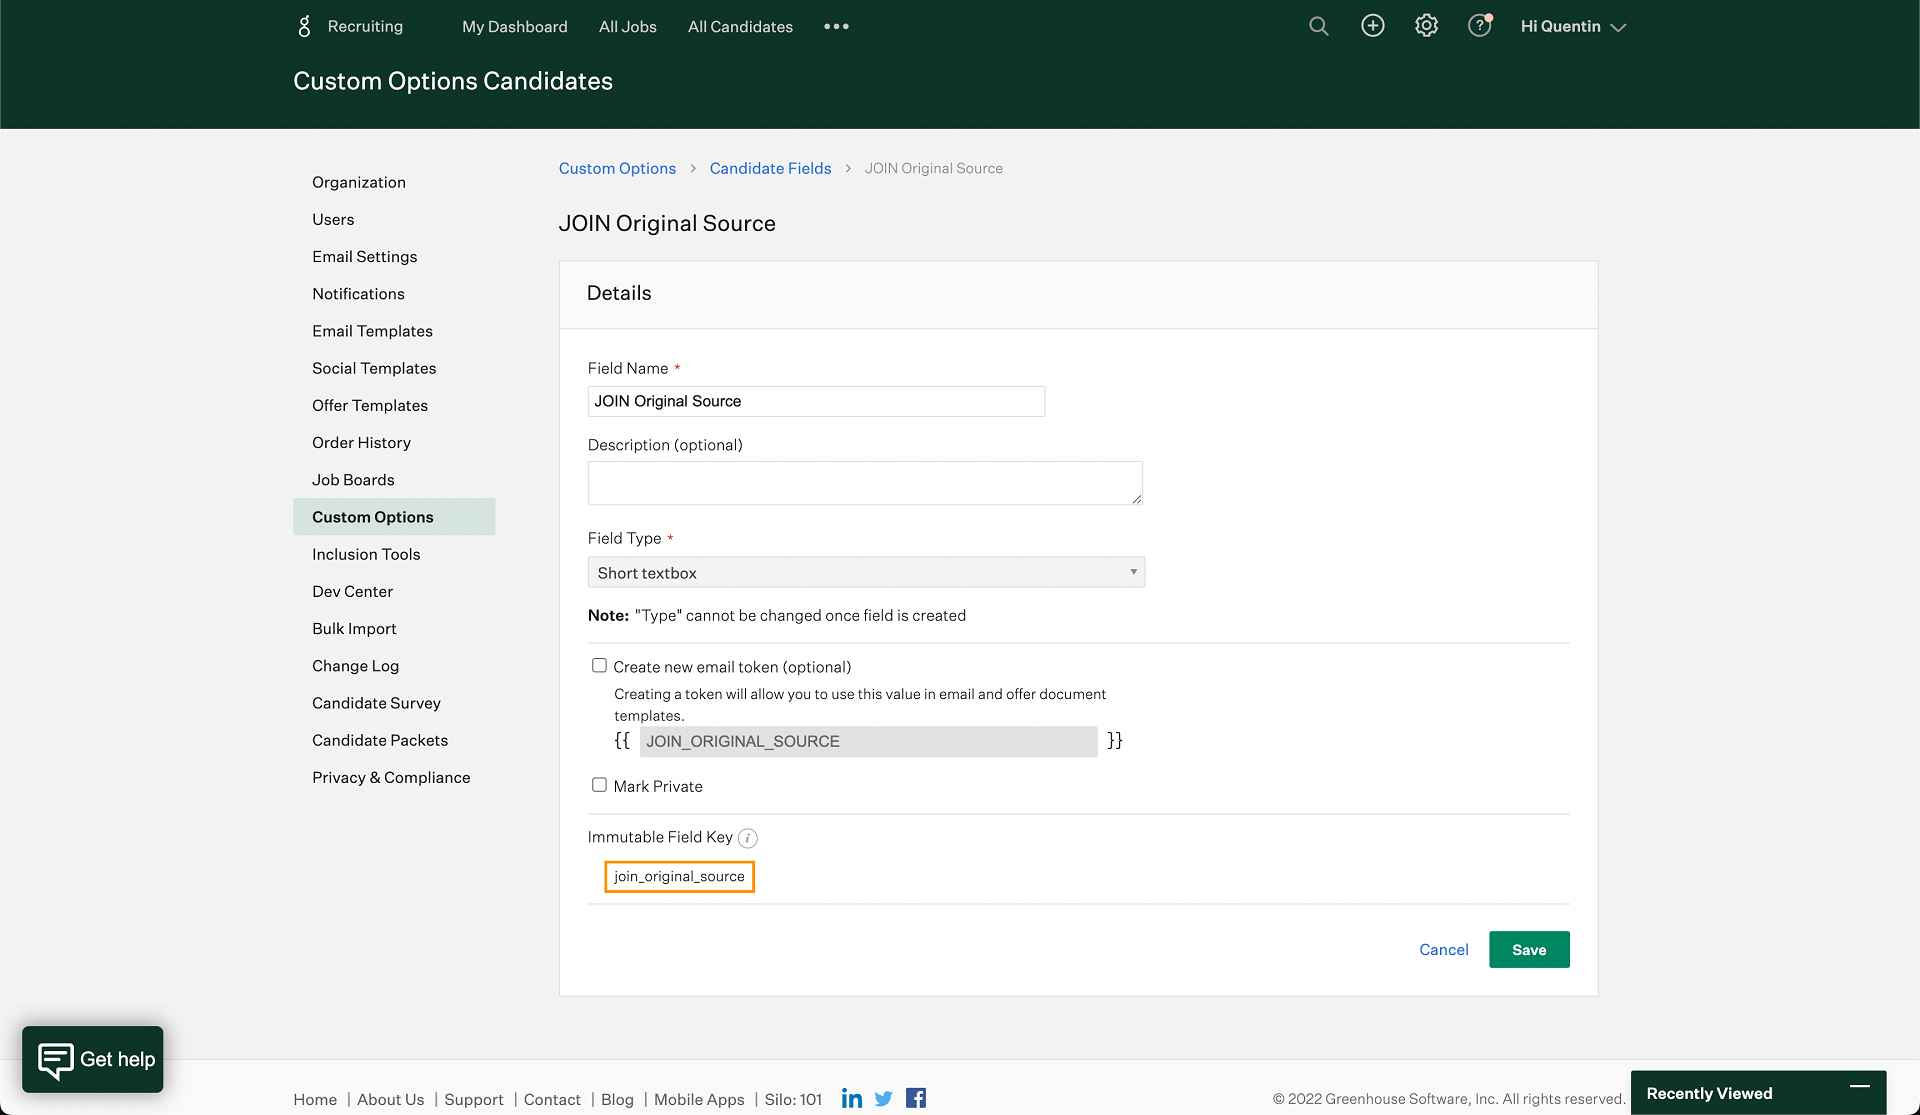
Step 4: Create a Custom Candidate Field (Optional)
Do you want the original source (e.g., LinkedIn, Indeed) of a candidate to be displayed in Greenhouse? Follow these steps to create a custom candidate field as a secondary source:
- Navigate to Configure > Custom Options > Company Custom Fields > Candidates.
- Click the Add Field button.
- Give the custom candidate field a name (e.g., JOIN Original Source)
- Select Short textbox from the Type dropdown menu.
- Click "Save".
- Copy the auto-generated immutable field key from the bottom of the page.
Now, all the keys and information you need from Greenhouse are prepared and in the next step, you simply need to enable the integration within your JOIN dashboard.
Step 5: Add integration data to JOIN
Almost done! The last step is adding your user ID, API Key, Secondary Source, and your Subdomain to your JOIN recruiter dashboard:
- Sign in and navigate to Settings > Integrations > Greenhouse.
- Under Subdomain, enter the subdomain of your Greenhouse career page.
- Under ATS Identifier, enter your User ID retrieved from Greenhouse.
- Under API Token, enter your Harvest API key.
- Under Secondary Source, enter the Immutable Field Key from Greenhouse.
- Click "Connect" in the upper right corner of the page.
Congratulations, you made it!
Greenhouse integration slideshow
Need some visual support to integrate Greenhouse? Check out our handy slideshow: